Showing posts with label design. Show all posts

27 January 2012

Knitting organizers

When I started selling on Etsy my product range was quite small. Well, it's still small, but it was even smaller at the time! :) My very first item I listed and sold was notebook cover, then laptop cover (sleeve) and then padded bag,.. Since then I have been sewing covers for almost everything! I enjoy doing various covers, cases, bags, ... because they keep things we like protected and safe! 

These cases below are knitting organizers! They are designed to store all your knitting needles (circular, double pointed and straight), hooks & cords as well as extra goodies. 


The fabric I used for this knitting case / organizer is hand-dyed by my friend Beata, who has also Etsy shop where she sells beautiful hand dyed yarns.

The knitting organizers have approx. 30 pockets, the smallest is 1 inch wide, the biggest is 4 inch wide. There is a flap at the top to keep needles in place. 


The above is a knitting case set made for Maire - The first case is just like the one above it and the other one keeps also wool and bigger needles inside while smaller needles are in outside pockets ready to be used anytime. The organizers are made from beautiful Amy Butler fabric.


The light brown fabric with flower print below gives the organizer a vintage feeling. It is one of my favorite!


I have done 3 cases from fabric below which were sold immediately. It closes with Velcro dots, not with strings. I personally think strings are better as the case thickness vary when it's full or half full and it might be a problem to close the organizer exactly where the Velcro spot is.


This was my very first knitting organizer! It is made from durable cotton fabric, it has secret pockets and it also closes with strings. 


I do not have any knitting organizers available for purchase in my shop at the moment. I usually sew them on request. if you are interested please contact me via Etsy or e-mail me!

How about a giveaway? Only 4 days left!!! 


19 September 2011

What's new at MirkaDesign?


Hi everyone,  

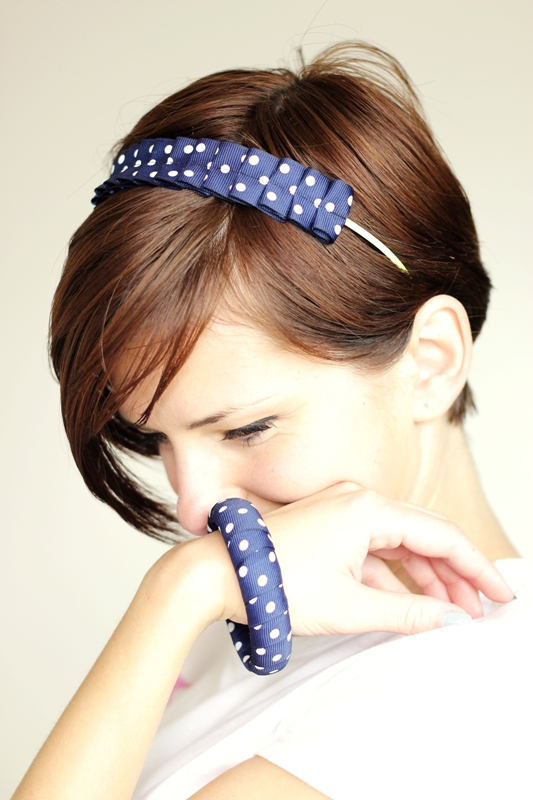
I would like to share some listings which I added to my shop recently. What do  you think about them? Would you like to wear any of these? Do you have any suggestions how to improve them?  Would you change material, colours, pattern?
2. Accessories ( headbands & bracelets) suitable for any occasion


Thank you in advance for your feedback!

16 August 2011

DIY projects (part 1)


Hi everyone!
Due to my orders I am quite busy and I don’t post too much recently. So please forgive me! I will add more posts very soon. What I want to share with you guys today is DIY projects which are extremely EASY to do and look fabulous. I have already tried to do few of these and it's been such a fun!

!! Please follow links displayed below each project to see full tutorials !!

1. Gift box packaging tutorial
Do you have a problem to find appropriate packaging for gifts sometimes? Make your own packaging! It takes only few minutes!!


How about a puffy boxes? This packaging is perfect for small gifts, such as jewellery, sweets, make up, perfume, cell phone, …


You can find the basic tutorials for “milk box”, puffy boxes and other packaging here!


2. Magnet containers
Give pretty spice or candy containers a new life in seconds by turning them into refrigerator magnets. 


Place a small, powerful magnet inside the back of an empty tin, which makes the tin itself magnetic. (Nonmetallic containers will work if you stick an adhesive magnet on the
outside.)

3. Flower project
This is quite funny project. All you need is empty toilet rolls (well, you need to start to collect them quickly), scissors, and quality paper glue!


Fold the toilet rolls, cut them into same sized thin strips and qlue every 5 strips together to form a flower. Use cloths pins to hold them together while the glue is drying. After that glue the flowers to each other and create a flowing connected design.


Full flower project tutorial is here.


4. Cherry Blossom Branch
For this project you will need pink paper squares ( I used yellow – which wasn’t great idea, because yellow cherry flowers don’t exist, hehe ...ups!  ) tape, scissors, bare branches, vase or frame.


Follow the origami club tutorial to make cherry flowers. Cut your branches to a size that will suit the frame or vase that your will be using. After you have arranged your branches in a vase or frame, attach the folded cherry blossoms to the branches using
tape.

You know what is great about this cute cherry blossom branch? It will never dry out!!


5. Painted Wine Bottle Vases
Collect a bunch of bottles and jars in different shapes and sizes and make lovely DIY centerpieces for any occassion!


Find out more about this project here!


Do you like any of these projects? Which one would you like to try? 

18 July 2011

More purses by MirkaDesign*

Hi Everyone,
 
Many people have asked me to do more purses and display them in my shop. So here are three new styles. Hope you like them!


I have designed these purses in a way that will comfortably fit your cash, credit cards, coupons, mobile phone and whatever else you need to carry with you. 


So these bags are basically combination of clutch and purse. It's very practical for myself. I do not have to carry any more bags! :) 


The purse has 12 pockets in total: 9 pockets for credit cards/business cards, coupons, gift cards,.., 1 pocket for bank notes, 1 zipped pocket for coins and 1 extra large pocket for your phone, keys, lipstick, make up …The purse is made of 100% cotton. It closes with black elastic band which holds your stuff inside the purse tightly.


The purse measures 10 x 6" when closed, 10 x 12" when opened. 


For more information please contact me via Etsy or Facebook page
 
Find out more hand-made items at www.mirkadesign.etsy.com

----------------------------------------------------------------------

Just a reminder! 10% discount is still available for all my followers (blog or Facebook). Just type IAMFOLLOWER at the check out and the coupon will apply to your entire order. Enjoy!

----------------------------------------------------------------------

28 June 2011

Fabric Origami Bracelet - my new craft project!*

I have always been fascinated in origami craft, especially origami in fashion. It is great to get an amazing object after following a few paper folding steps. Some origami are very easy to follow, some are not that easy but it is always fun  to create something from small piece of paper. This time I tried to transform this amazing paper craft to a little bit different level. I used a fabric instead of paper. It took me a while to find good fabric which doesn't gape too much and keeps folds together. And I think I found it! Here is the result!


 This bracelet adds a sparkle to any outfit!


The bracelets look great in pair too! You can get 15% discount for your entire order if you order more than 1 bracelet in my shop


Please leave me a feedback! Do you like the bracelet?

25 June 2011

Good morning sunshine!

This is my latest project - blouse made by me last minute before leaving Cork to Malaga for holidays. I used white&red flower fabric which was originally sold as a duvet cover :)  When I saw it in the shop I imagined some nice summer dress or top made from it as the material was very soft and breathable, also very light. So I bought it and finally I decided to make a summer casual blouse. 


What I really like about this blouse is Carmen-Style neckline. It exposes your shoulders just enough to feel sun heat from above :)


I would like to know your opinion. Do you like the pattern? What about a fabric choice ? Would you change anything? 


All the above pictures were taken in Malaga streets by JH . Would you like to taste a little bit of Malaga? Click here to check out a video from our holidays! Enjoy! :)